One of the leading shore dives in Australia is known as Halifax Park, in Nelson Bay just north of Sydney. A spectacular dive renowned for nudibranchs and other small marine life, Halifax Park is a macro photographers dream. During one memorable dive there, I was using my trusty Nikonos V, with a 1:1 extension tube set-up. Although I found plenty of nudis, all were larger specimens and more suited to a 1:2 ratio! Typical.
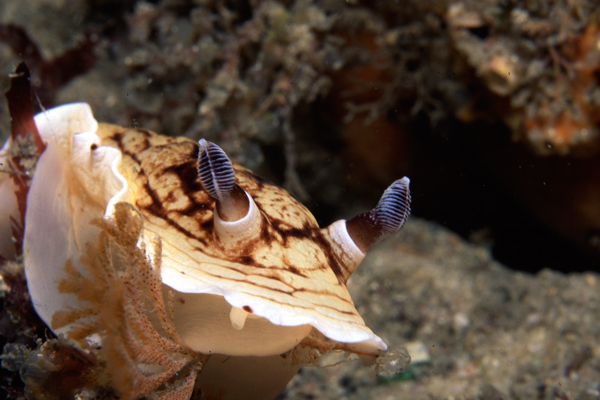
 One nudi in particular – Aphelodoris varia – was found in large numbers. Although very common in south-eastern Australia, not many great photos have been taken of this generally plain, brown slug. Typically measuring 5-15cm, this nudi is clearly too big for the 1:1 extension. That day I got a great photo of A. varia!
What made this photo special was the fact that the subject and the equipment I had were not compatible for the normal nudi photo. Instead of ignoring the subject, I elected to change my composition to focus on an alternative angle that would work. Composing the nudi front on, with the nudi seemingly lunging towards the camera from the left side of the frame, not only gave a pleasing composition, but one that implies action – no mean feat for a nudibranch photo.
This dive reinforced an important lesson of underwater photography – the ability to get pleasing photographs depends little on the environment and your equipment, and far more on your approach to how you set-up your photos. Putting thought into this key step is vital in increasing the ratio of photos you keep to those you throw away.
Underwater photography is a complex activity, with a lot of steps to remember in order to get the best shot possible. Experienced photographers make these steps instinctively, but for newer photographers this can be aconfusing and task oriented activity. To remember these steps, I have developed and use a simple mnemonic – PLACEBO.
The PLACEBO Principle
Meaning control in an experimental situation, the word PLACEBO is not only easy to remember,but it also implies exactly what we’re aiming to achieve. Each of the letters in the word PLACEBO represents akey step in the quest to get better photos.
- P – Positioning: Choose the best position for the photograph. In underwater applications, we generally get low, get close and where possible shoot upwards. Take into consideration not only the subject, but also the backgroundand negative space.
- L – Lighting: Consider the lighting needed for a good result, including natural light and artificial (strobe) light, and the desired lighting effect. Ensure the strobes have recycled fully, are correctly aimed, and have the correct power settings. Consider also the likely shadows ·
- A – Aperture, Shutter, ISO and White Balance: Confirm the right settings of these important exposure variables
- C – Compose and Focus: Compose the shot (considering all elements covered in positioning), and ensure correct focus.
- E – Expose the Film: This means make the photo! Remember to be steady as you press the shutter button – too much movement could blur the photo.
- B – Bracket, Bracket and Bracket Again: Rarely will the first shot you make of a subject be the perfect one. Bracket for exposure (aperture and / or shutter), bracket for lighting effects and bracket for composition. In the digital era we have the strong advantage of instant feedback and histograms, as well as a lot more exposures available, but remember that what you see on your cameras LCD will most probably differ from what appears on your monitor.
- O – Organise your thoughts for the next subject so that you have your plan in place.
Applying PLACEBO in Your Dives
Newer underwater photographers may wonder how experienced photographers can apply all of the above steps (regardless of whether or not they use the term PLACEBO to remember them) and still manage to capture the action.
While sometimes there is no choice to snap off the action as it occurs, generally underwater photographers will have thought before the dive about the particular objective for the dive, and will then search out appropriate subject matter and background situations.
Instinctively they will consider positioning and lighting, and more often than not, Aperture, Shutter, ISO and White Balance settings will be pre-set to a likely combination – even if they aren’t right it will be a quick change to get them so.
On most wide angle dives I do, I know that with my particular combination of lens, strobes and camera, the correct settings for a subject at a camera-to-subject distance of 1m is an aperture of f/8. Accordingly, before I submerge my aperture is set, and the shutter speed is set to 1/125th. ISO is set at ISO100, and white balance generally stays on “Cloudy +2”. As I descend, I start to set the strobes up for approximate targeting for the 1m range.
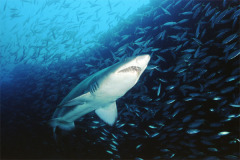
 One of my best shark shots was captured by having a combination like this setup. When the shark came swimming towards me, I could position myself low and wait, knowing that my settings were optimal. Bracketing is a natural activity for underwater photographers – it simply isn’t always feasible to go back to get the shot if it was missed.
 On one occasion diving off Walindi in PNG, I was fortunate to find a Pink anemone fish in a green coloured anemone. Seeing that it quite playful, I positioned myself on a good angle and snapped off many shots, changing positioning of the camera and lighting often.
I took 32 shots of that fish, and although many are good, one in particular has received good feedback. It was the 28th shot.
After we’ve finished with that subject, its time to organise our thoughts – we think about the next subject we might look for, check our strobes and pre-set our aperture and shutter settings once again for the most likely combination.
The whole cycle starts over once again.
PLACEBO is an easy to remember and useful mnemonic, one that can be used by the novice photographer and the more experienced ones alike.
By carefully considering the steps in PLACEBO, we are well on the way to making good photos, not just taking snapshots.
Please note: This article is an update of one that was published in Issue 8 of UwP Mag. I first developed the PLACEBO Principle in the film era, but the principles apply just as much today, and there is much the underwater photographer can gain from applying the PLACEBO Principle.
